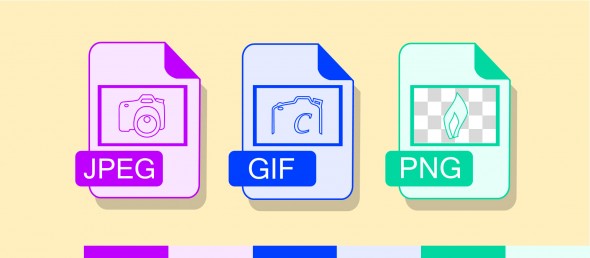
Having a smooth, fast loading website is key to optimal user experience. A great way to lose the wait is to trim the fat, as in the weight of your page content. There is a number of ways to do that, such as using HTTP compression to reduce the size of the data that needs to be sent to the client. Despite the fact that video is taking over the web traffic, images make the majority of all web content. Understanding images and how to optimize them are skills for anybody dealing with frontend performance. Let’s start off by exploring the GIF image format and how to optimize it.

GIF is a lossless image format, which features the ability contain multiple graphic images inside of a single file. GIF is the standard format for compressing images with large areas of solid colors and crisp details like those in line art, logos, or type. Being an 8 bit-depth image format it would have disappeared from the web after the introduction of the JPEG and PNG file formats, but GIF is still a favored web file format thanks to its frame animation feature. GIF comments, metadata, and Application Extension sections don’t contribute to the rendering of the graphic data. This data can and should be removed. Pay close attention, because this is where the PNG format sweeps in and takes the win.
How One AI-Driven Media Platform Cut EBS Costs for AWS ASGs by 48%

PNG images are also a lossless image format that very closely mirrors GIF images. The PNG format was defined 10 years after the GIF format, allowing PNG images address some of the flaws that GIF was facing. Let’s name a few to get a better picture:
- The size of PNG palette entries can be smaller than the corresponding GIF palette entries on images with less than 256 colors.
- PNG’s ancillary data sections support compression allowing their overall size to be reduced.
- PNG’s DEFLATE algorithm achieves better compression than GIF’s LZW algorithm.
Programs that convert from a GIF image to a PNG image focus only on on converting graphical data. Comments, metadata, embedded thumbnails, Application Extensions, and other non-graphical information present in a GIF are not transferred over into the resulting PNG, shredding all the excessive data, resulting in a lighter image. The median size of the GIF images was 6900 bytes. The median size of the result PNG images was 5546 bytes. This means the median savings of converting all GIFs to PNGs is 21.07%. This result is nothing short of amazing.
Animated GIF optimization 101 list
1. Color reduction – shrink gif file size by reducing the number of colors in each frame. Each gif frame can use up to 256 unique colors, and by reducing this number, you can achieve a smaller file size.
2. Lossy GIF compression – Compresses GIF with Lossy GIF encoder which implements lossy LZW compression. It can reduce animated GIF file size by 30%—50% at a cost of some dithering/noise.
3. Remove every n frame – The frame drop option can remove every second, third, or fourth frame to reduce frame rate and, therefore, file size. Useful for gifs with a high frame rate.
4. Optimize Transparency – This option makes some unchanging parts of the frames transparent. The results variate a lot on the nature of the image. It may give huge file size reduction in some cases when images have large, static areas.
5. Remove metadata, or unused palette entries from a GIF and write a better optimized GIF.
6. Combine or generalize local palette information in individual Graphic Image Data sections into the Global Color Table.
7. Reuse existing animation frames.
8. Minimize what is changing between animation frames, reducing the size different Graphic Image Data sections.
There are numerous aspects of the GIF image format which allow for lossless optimizations to reduce file size while maintaining image quality. Converting to PNG is a nice, universal way to do this. It’s also important to note that there are some great tools out there to optimize the weight of GIF files. Checking these 3 free tools out is more than advisable;
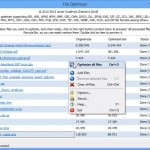
FileOptimizer

FileOptimizer can compress JPG, GIF and PNG images, and even executable files, archives, Microsoft Office documents and PDF files. The program has one of the most straightforward interfaces here: drag and drop your images onto FileOptimizer, right-click, choose Optimize and that’s it. This simplicity has a downside, as your source files are replaced by the program. The originals are sent to the Recycle Bin so remain recoverable. This may be a problem for some users.
ImageOptim

ImageOptim is a Mac tool that optimises GIF, JPEG and PNG images by acting as a front end for a host of other applications. The program is all about lossless compression – removing comments, colour profiles and so on – rather than re-encoding or reducing the number of colours. As a result it won’t cut file sizes by quite as much as some of the competition, but at least you don’t have to worry about any loss in image quality. You can do better elsewhere with individual tools, but if you just want a single, simple Mac-based tool, which can handle GIFs, JPEGs and PNG files, this tool is the way to go.
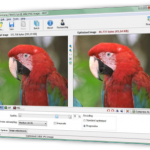
RIOT

RIOT is a free tool for image conversion. A clean and clear interface makes it easy to compress individual GIF, PNG or JPG images and compare the results while a batch interface processes multiple files at very high speeds. RIOT is more about reducing the number of colours in your image, re-encoding JPEGs with a lower quality value, and so on. RIOT does surprisingly well, shredding GIF sizes by 40%.


